Introduction
The sandbox environment functions as a simulated version of the actual system, designed for testing and development purposes without interacting with real data. This environment employs mock payroll providers and payslip readers in order to allow developers to evaluate the API interface without compromising real data privacy. For the conceptual data model behind these endpoints, see Data.Test Personas
The sandbox environment includes three pre-configured test personas with corresponding mock data in the backend. Use these personas to test different workflows throughout this guide. Persona 1: Sarah ChenInitial Setup
API Key & Callback URL
Before you begin testing, ensure you have the following:- An API key for authentication: please ask your Teal connection to supply you with an API key
- A callback URL for receiving webhook notifications: generate your URL in webhook.site
Webhooks Setup /webhooks
Configure webhooks to receive notifications for events such as new payroll submissions.
Optional fields:
signing_secret (for HMAC verification), encryption_key
(for AES/GCM payload encryption).Configure Client Settings /configuration
Configure client-wide settings that affect sandbox behavior, such as payroll lookback periods and recurring checks.
In sandbox, you can test the HOURLY frequency (not available in production).
User Setup
Before starting any journey, complete the Initial Setup (Webhooks and Configuration) and User Setup steps below. These steps only need to be done once.Create a User /users
Create a user using one of the test personas defined above. Include the ni_number to match the mock data for that persona. In this example, we’ll create Sarah Chen:
Generate a User Token /user-tokens
After creating a user, generate a token to authenticate subsequent actions for that user. The token ensures that actions such as account connection and payslip uploads are securely attributed to the correct user.
Authorisation Terms Request /authorisations
Before connecting a payroll account, users must accept your terms and conditions. This request records the user’s consent:
Optional fields:
term_id (auto-resolves to latest active term if omitted),
ip_address (captured from headers if omitted), fingerprint (device/browser
fingerprint).User Journeys
Direct Connection
This is the simplest way to get started with sandbox direct connections. The/accounts/direct-connections endpoint automatically checks all available providers and returns payroll data directly.
Prerequisites: Complete Initial Setup (Webhooks, Configuration) and User Setup above.
Direct Connection /accounts/direct-connections
For sandbox direct connections, use this simplified endpoint that automatically checks all available direct connection providers and returns payroll data directly.
- Takes just a
user_id(no provider selection needed) - Automatically checks all available direct connection providers
- Creates accounts automatically for any provider with data
- Returns payroll data directly (no separate
/payroll/entries/connectionscall needed)
User Connection
This journey describes connecting to a specific payroll provider. Use this when you need to connect to a particular provider or when the simplified direct connection doesn’t meet your needs. Prerequisites: Complete Initial Setup (Webhooks, Configuration) and User Setup above.Scenario-Based Testing
For certain providers, you can test realistic flows by sending specific usernames that match predefined scenarios. These scenarios simulate real-world conditions such as MFA challenges, incorrect credentials, and successful logins. The user you create does not need to match the test user names listed below. The password can be set to any value. If you send auser_name that does not match a scenario username, the sandbox will return fake data as normal.
The available scenario usernames are:
happy_mfa, happy_no_mfa, wrong_mfa, wrong_username, and wrong_password. When sending date filters via the API, ensure they are in ISO 8601 format (e.g. 2025-08-01T00:00:00Z).
These scenarios can also be used on the sandbox webapp. When testing via the webapp, ensure the user’s payroll_period_months lookback is set large enough to cover the scenario’s payroll date range.
Connect a Payroll Account /accounts
This simulates the user connecting their payroll account for automatic data retrieval.
Optional fields:
user_name, password, extra_login_params (e.g.
company_name for Dayforce).extra_login_params object for provider-specific login fields (omit it when it isn’t required). Dayforce connections require setting extra_login_params.company_name.
As with production accounts, when connecting we will retrieve payroll immediately. For sandbox, when not using scenarios, the number of payroll submissions generated matches the payroll_period_months configuration. If this is set on both the client and user configuration, the user level config takes precedence. For example, if it is set to 7 months, we’ll return 8 payroll submissions (including the current month). If it is not set we’ll take a default of 36 months. To simulate a gap in the payroll, the Shape provider will leave a 3 month gap from the time of the request.
Retrieve Submitted Payroll Information /payroll/entries/connections
Retrieve latest payroll for a connected account. For sandbox, we’ll always return new payroll where the pay_date is set to the current day. For Shape provider we will still maintain a 3 month gap.
Payslip Upload
This journey outlines the process for extracting payroll information by uploading a payslip. Prerequisites: Complete Initial Setup (Webhooks, Configuration) and User Setup above.Upload Payslip /payroll/entries/payslips
This request simulates the user uploading a payslip to extract payroll information. Extracting payslip information can be done using the endpoint below but will usually be done by the user through the WebApp.
This example uses James O’Connor:
HMRC (Gov Connect) Connection
This journey connects a user to HMRC via Gov Connect using thehmrc provider.
Instead of returning payroll data immediately, connecting returns an authorization_url
(an invite link) that the user follows to authorise HMRC data sharing. Once
authorised, income data is fetched and can be retrieved with
GET /gov-connect/{user_id}. You can subscribe to the user-gov-connect-data-submitted
webhook event to be notified when new HMRC income data is available.
Ask your Teal connection for the working HMRC provider id to use for
payroll_provider in your environment.hmrc_enabled: true) and the user must have an active authorisation.
Connect an HMRC Account /accounts
Create an hmrc account, selecting the flow via extra_login_params.flow. The
flow must be either non_mtd or mtd.
ni_number may optionally be supplied in extra_login_params. If the user’s NINO is
already saved against the user record it is not needed here.authorization_url to complete HMRC authorisation.
Self Employed
For the self-employed flow ("flow": "mtd"), the user is redirected to HMRC to authorise
Making Tax Digital access and then returned to Teal’s callback. This requires an HMRC
sandbox test user.
Contact Teal to be provisioned an HMRC sandbox test user. You will log in on the HMRC
authorisation screen using the supplied test details.
"flow": "non_mtd"), authorisation is verified against HMRC
using the user’s NINO and date of birth, and completion is signalled to Teal via webhook.
The NINO and DOB must correspond to a valid HMRC test taxpayer.
Contact Teal to be provisioned a test user. In sandbox, the
authorization_url shows only a dummy page rather than the full HMRC authorisation flow
used in the self-employed journey.Retrieve HMRC Income /gov-connect/{user_id}
Once the account is authorised, income data is fetched automatically. Retrieve the stored
Gov Connect income submissions for a user (MTD shape).
Fetch HMRC Income /gov-connect/entries/connections
Income is fetched automatically when the account is authorised, so this step is only
needed for subsequent retrievals — to pull fresh income data for an already-connected
account. Any new data is persisted and can then be read via GET /gov-connect/{user_id}.
This endpoint uses the user’s bearer token.
201 Created with the income submissions when data is returned, or 200 OK
with an empty gov_connect_submissions array when there is no new data.
General Data Retrieval
Retrieve Payroll Data /payroll
Retrieve the payroll data submitted through a connected account or document upload. This example retrieves payroll for Amina Diallo:
WebApp Usage
Teal’s webapp can be tested by accessinghttps://app.sandbox.goteal.co/ in the browser.
Launching the webapp for a user
When you create a user token viaPOST /user-tokens, the response includes a webapp_link field:
webapp_link URL. This establishes an authenticated session via a secure HttpOnly cookie and redirects the user into the webapp — no token appears in the final URL.
Embedding in an iframe
When embedding the webapp in a cross-origin iframe,SameSite=Lax cookies are not available (all modern browsers block cross-site cookie access in iframes). The webapp handles this automatically via the postMessage protocol:
- The webapp loads and detects it is embedded (
window !== window.parent). - It posts
{ type: "teal:session_required" }to the parent window (origin-restricted to thecallback_url). - The parent responds with
{ type: "teal:session_token", token: "<jwt>" }using thetokenfrom the/user-tokensresponse. - The webapp uses the token as an in-memory
Authorization: Bearercredential for all API calls within that iframe session.
src to https://app.<env>.goteal.co/?callback_url=<your-parent-origin>. The callback_url parameter tells the webapp which origin to trust for the postMessage exchange.
The token is held in memory only — it is never persisted to cookies, localStorage, or sessionStorage within the iframe. The session lasts for the lifetime of the iframe. If the iframe is destroyed and re-created, the parent must respond to a new
teal:session_required message.client_callback_url, the webapp also communicates journey outcomes back to the parent page via postMessage (type: teal:journey_outcome).
You can test the webapp with any of the three personas defined at the top of this guide (Sarah Chen, James O’Connor, or Amina Diallo).
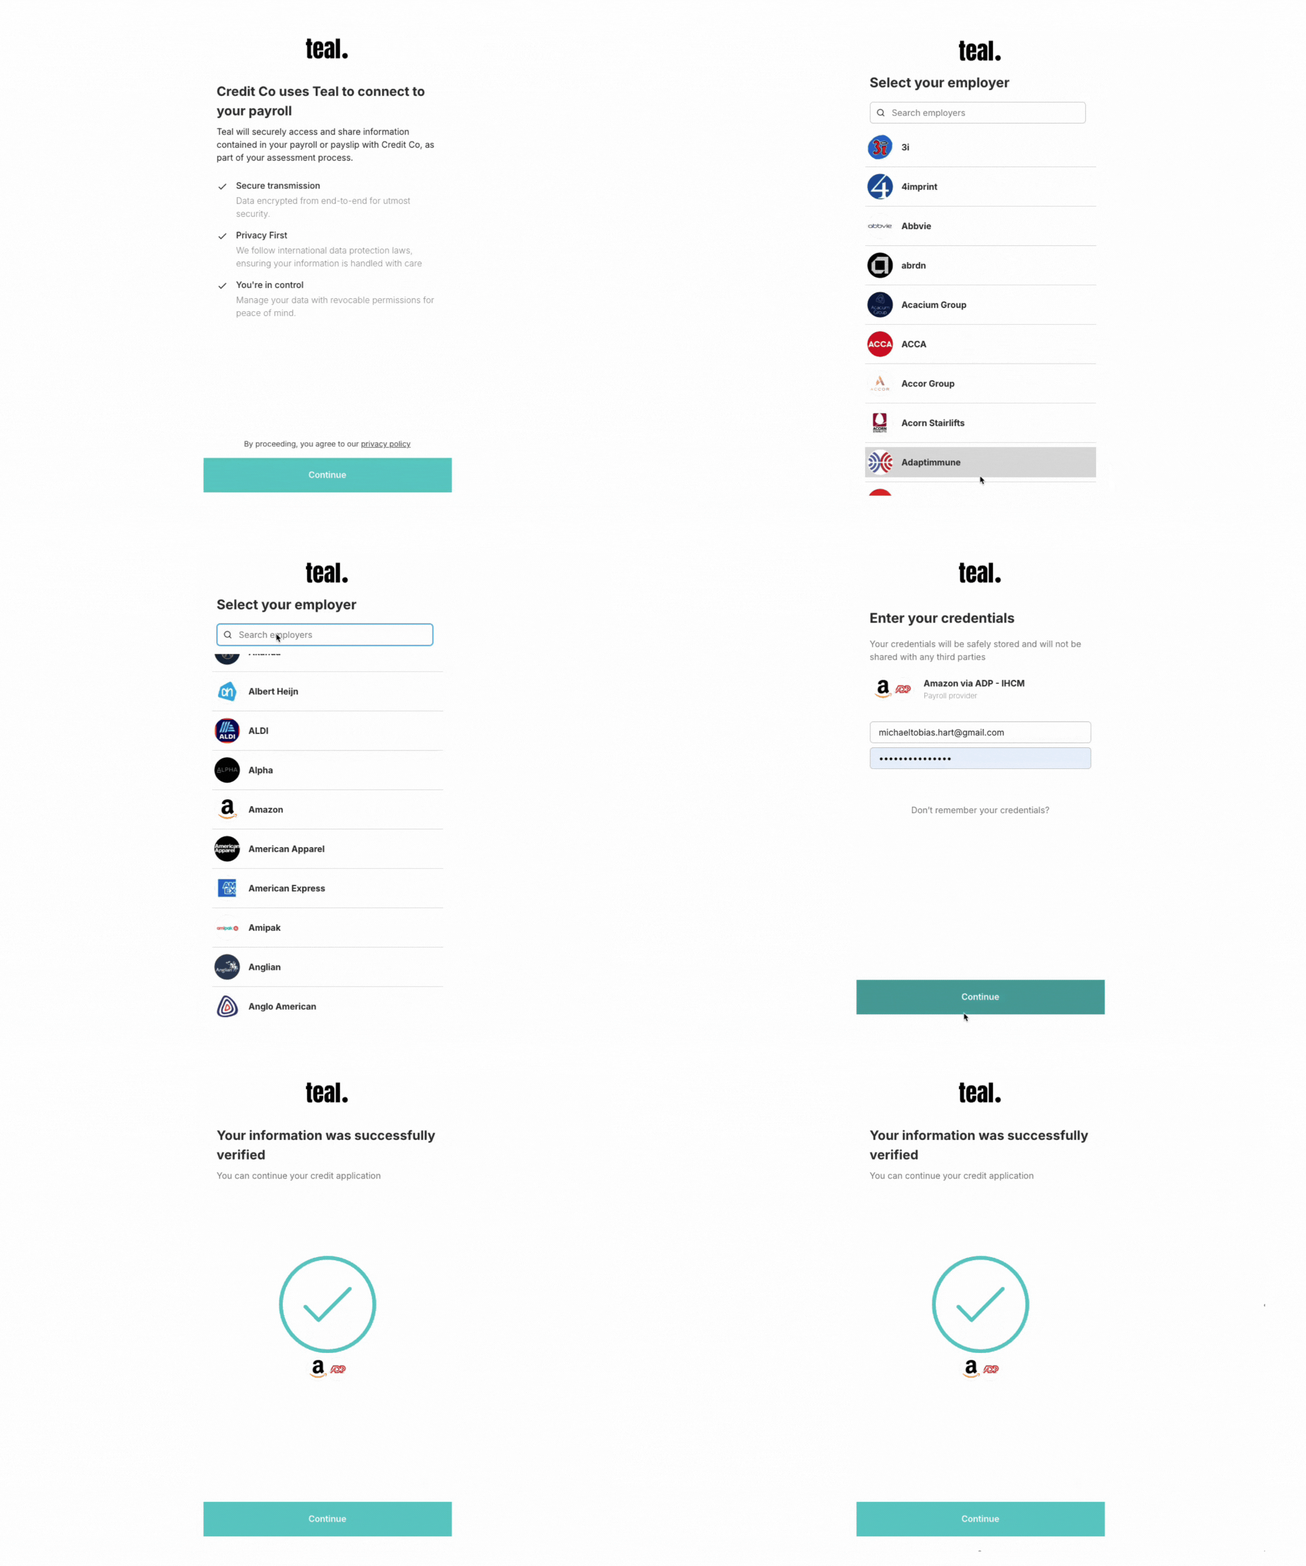
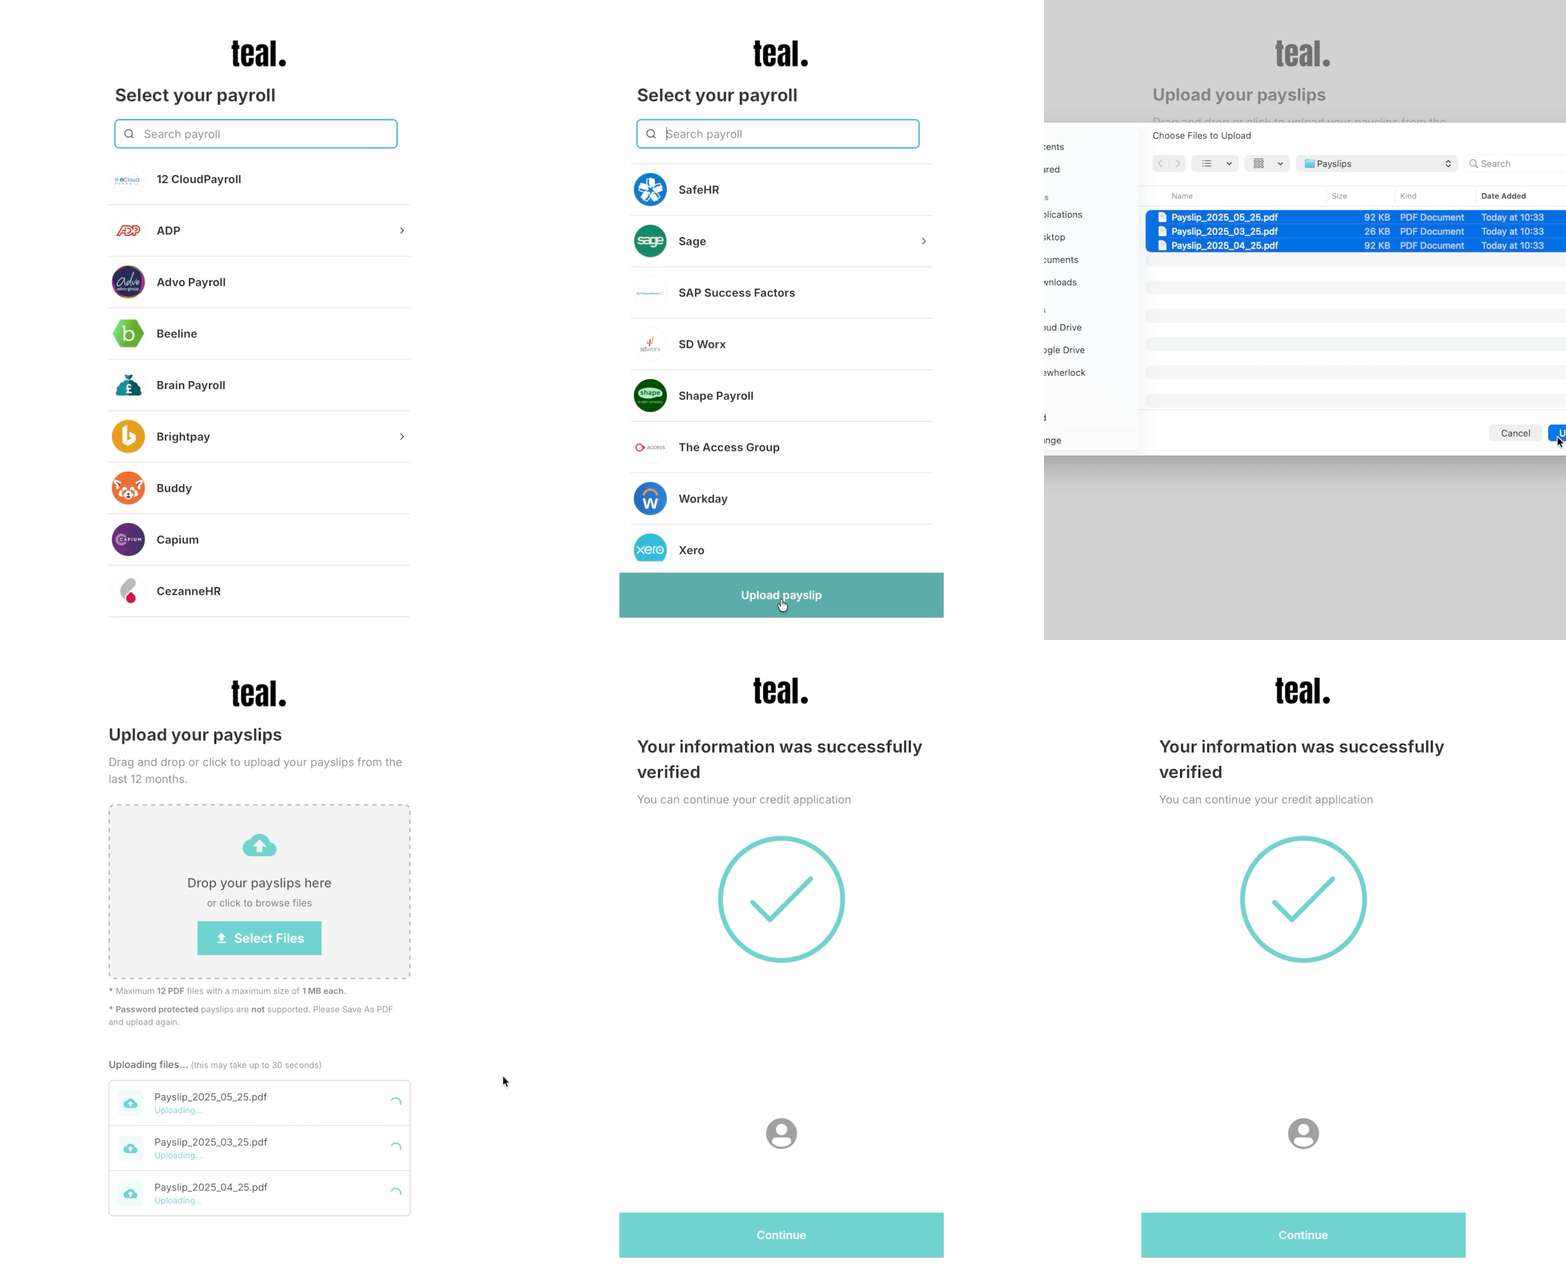
Connect a Payroll:
Cleanup
Deleting a User /users
After testing, clean up by deleting the test user and their associated data. Use the user_id returned when you created the user (from any of the test personas).
OAuth2 Test Credentials
Some of our providers use an authorisation flow known as OAuth2. This allows the end user to be redirected to their payroll provider login screen, where they can grant authorisation to share their data. Below is an example login page: